Antipyretics for children are prescribed by a pediatrician. But there are situations of emergency care for fever, when the child needs to give the medicine immediately. Then the parents take responsibility and apply antipyretic drugs. What is allowed to give to infants? How can you bring down the temperature in older children? Which medications are the safest?
There are many options for finishing the ceiling, and everyone can find their advantages, but not every ceiling can be made with their own hands, without having the skills. Therefore, the ceiling of MDF panels can, by right, be considered a good choice. In addition to the price and practicality of such a design, you can list a whole list of advantages, so we will not focus on them and turn to practical guidance that will help you to perform all the work yourself, even if such experience has never existed.
The ceiling from MDF panels can, by right, be considered a good choice
Features of MDF panels.
In fact, MDF panels are an alternative to wood paneling, but they are not made from solid wood, but from pressed sawdust with various imitations applied to the surface. Thanks to this production technology, you can choose the right pattern for any interior.
The MDF panels are joined together in the same way as the classic paneling, which allows the installation in the shortest possible time.
In fact, MDF panels are an alternative to wood paneling, but are not made from solid wood
But that there was no doubt in the choice, let us list some features of this material:
- due to its density, MDF has a high degree of heat and noise insulation.
- Do not be afraid of wet cleaning and detergents.
- The cost of such panels is much lower than wooden ones.
- After installation do not require additional processing.
- Thanks to a wide selection suitable for any design concept.
Mounting of the bearing skeleton of the ceiling.
In order to avoid unnecessary materials after the repair, you should always start with the calculations and compiling a list of what is needed.

Ceiling Mounting Tools
But if the quantitative calculations can be made only based on the size of the room, then the list of all necessary can be made and in absentia:
- Guide profile (from the perimeter of the room).
- A wooden bar, the thickness is the same as for the guiding profile (the amount from the calculation of the step is 50 cm).
- Suspension, which will fix the bar to the ceiling (it is better to take a stock, strength is not superfluous).
- Dowels with a screw diameter of 6 mm (the exact amount can not be counted, so take "by eye").
- MDF panels (based on the size of the room).
- Kleimers, special fasteners for MDF (as well as dowels, will not be superfluous).
- Ceiling baseboard (based on the length of the perimeter).

Guiding profile
When all materials and tools are at hand, you can start marking. From the ceiling, you need to retreat 5-10 cm, and use the level to draw a line along the entire perimeter of the room.
Tip: draw a line from one point, and do not connect several. The line must be strictly horizontal, and not repelled from overlapping.
At this mark, with the help of a puncher and dowels, a guiding profile is fixed.
When the profile is fixed, a groove is inserted into its grooves from the wall to the wall, and strictly perpendicular to the direction of the future panels. The bars should be placed 50 cm apart. In this position, the tree sags heavily, so it is necessary to fix it with the help of hangers that are attached to the ceiling and the bar. Each bar should be checked level, so that there is no distortion. The more often there are the suspensions, the stronger the construction will later turn out.

The more often there are the suspensions, the stronger the construction will later turn out.
Tip: Before drilling the ceiling and walls, make sure that there are no electrical wires inside. To do this, use a special device, which can be rented, so as not to spend money on an expensive purchase.
After all the hangers are fixed, you can check the strength of the structure, and if there are weaknesses, mount additional hangers.
The first stage is finished, and you can proceed to the set of panels.

Wooden frame will require pre-treatment of the material to protect against excessive moisture
Mounting of panels.
Finishing the MDF ceiling with panels, the simplest stage, and will take much less time than the assembly of the frame.
You can start from any wall, but strictly groove outward. The first segment is attached to the guide profile (then their hats are closed with a ceiling skirting board), then, in the groove in the area of the bar, a kleymer is inserted, which, in turn, is fixed to the wooden bar with a screw or a construction stapler. Thus, the panel is fixed for each bar.

Finishing the MDF ceiling with panels is the simplest step
Tip: fix the first panel to gradually move along the wall, and tighten the fastener. If you screw in the screws at the beginning and at the end of the panel, a skew may appear, which will affect the entire ceiling.
Next, the groove of the next one is inserted into the groove of the first panel, which is also fastened to the bar with the help of the kleimers. Thus, all the elements are alternately dialed, but it is important not to forget about the places of future lamps. Once the necessary panel is fixed, you need to drill holes for them right away in the necessary places and pull out the wires. If you do not do this at this stage, then it will be much more difficult.
A small complexity will arise with the finishing panel, which must be cut along, for this you can use an electric jigsaw, or a simple wood hacksaw.

Ceiling baseboard
Now that the last segment is fixed, it's up to the ceiling skirting board. This is the finishing touch in the finish of the MDF ceiling panels and you can enjoy the result.
Specialists noted that repair, made by own hands, looks much more attractive than if it were carried out by others.
MDF is a wood-fiber board with medium density. It is used in the manufacture of fittings and finishing materials. Ceiling panels are boards on one side of which are cut grooves, and on the other - thorns. They can be used for ceiling, wall and partition walls. In this article we will talk about the ceilings.
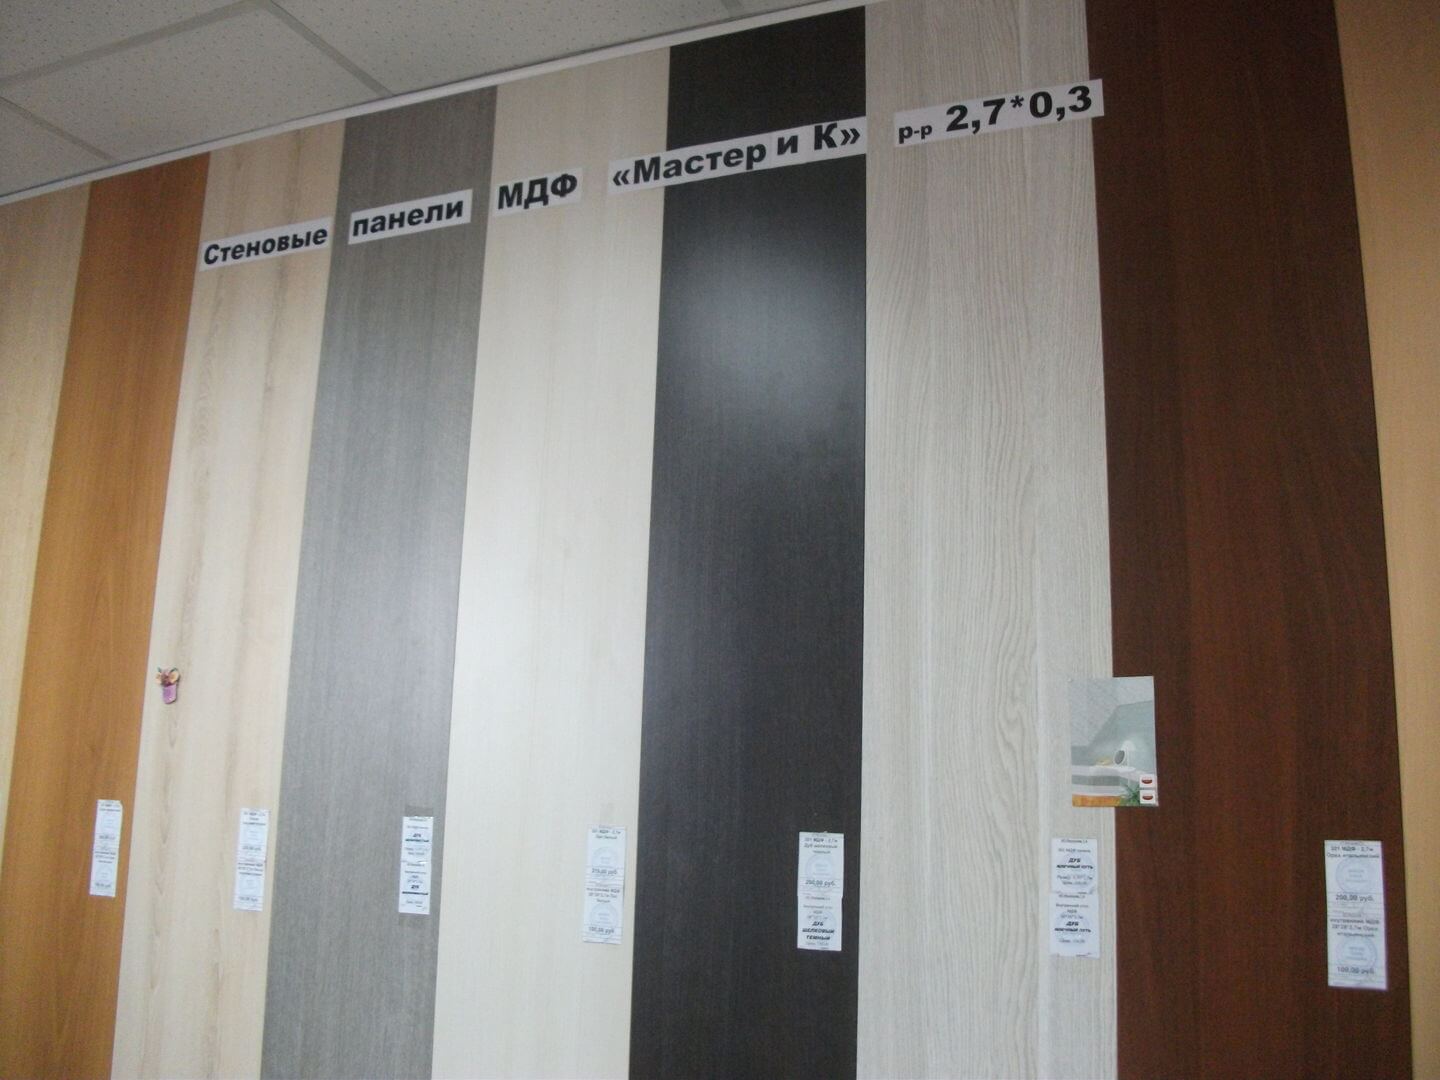
Types of MDF panels and their advantages
There are conditional groups of panels:
- with veneer coating. The product is not cheap. In the process of making products, a natural tree is used. It serves as the face covering of the part. Externally, the panel does not differ from the wooden product. The difference is evident if you look closely from a close distance. The texture and color gamut of products simulates a wooden surface;

Section of veneered panel
- waterproof ceiling panels mdf, in which the laminated surface. On the front there is a polymer film with excellent water resistance. Laminated MDF panels copy the surface of natural formation (stone, marble, wooden texture). Since the panel is water resistant, it is not afraid of the effects of water. It is used wherever surface contamination is possible. If to compare with veneer, the laminated panel costs less;

Waterproof MDF panels
- painted panel has a cost less than laminated. But there are fewer applications here. The product does not have a protective film coating. Protection from water here is worse. But it is possible to wipe and wash the surface if you do not use strong detergents. The panel is glossy and matte. Solid products create smooth colored surfaces, and due to the variety of colors, a bright combination can be made. The material will look great on the ceiling in the nursery;

Painted panels in the interior
- paper coating of panels is a paper applied over the substrate. Apply material for the bathroom, the kitchen should not be. Can be used for a corridor or in a room with a normal level of humidity. However, even though there is a narrow area of application, many people buy panels because of their low price. This is the cheapest version of MDF panels.

Standard MDF with paper coating
Install the ceiling from MDF
The advantage of a ceiling with a frame is that it is easy to assemble. And you can change the interior with the built-in lighting. How is the ceiling made of MDF panels with their own hands?
We collect the frame (lathing)

Wooden crate by MDF panel
For this you can not do without a screwdriver, a perforator, a dyeing thread, a building level, a hydraulic level and a hammer.
Also, you can not do without metal or plastic anchor bolts (better than the first). There is a need for metal straight profile pendants, which are used in the process of frame mounting under gypsum board. It is difficult to overestimate the importance of the presence of nails (25 mm), furniture metal corners (with a width not exceeding the thickness of the frame bar). Do not do without wood screws (length 25 mm).
It is better to make a frame of a wooden beam (with a cross section of 35 x 35 mm). This is the optimal thickness. The beam is fairly sturdy to withstand the weight of the ceiling without bends. And the bars themselves are not very heavy. Due to the width of the beam, it is possible to screw the screws into its surface without fear that the material will crack. If you do the usual lathing under the ceiling, the design will be simple. We will work with a hammer, a puncher and nails. Instead of the bar, you can take a rack with a thickness of about 20 mm. This can be done if the ceiling is level, or you are not going to mess with the embedded lighting in the MDF surface.
Usually, a lining is used for such a lath. Skeletons make the same for different prefabricated ceilings from the MDF panel.
If you have such a skeleton, you need to mount the slats directly to the ceiling. Where necessary it is necessary to lay brusochki. You can make the assembly as follows: the guide rails are attached to the ceiling, then the carriers must be attached to them.
On the perimeter of the room the level of the frame is drawn using a thread with paint and a hydro level.
The height of the luminaire is taken into account, which then will be mounted in the ceiling. At the marked points a bar is fixed. We fix it with the use of anchors. Then nylon thread or line is stretched in parallel to the direction in which the MDF panels were fixed to the ceiling. Creates a clear level of ceiling.
After we install the supporting bars. They are mounted perpendicular to the placement of MDF or stretched thread.
Using furniture corners and screws in 25 mm, we fix the supporting bars to the guides. The bars are aligned on the thread thanks to direct suspension on the ceiling. For a wide room, the string stretches at different points. Bearing bars are mounted at intervals not exceeding 60 cm. Parallelism between them is not necessary. If you mark the level correctly, we have a perfectly flat surface. And now the wires of the illumination of the places you need are being stretched.
How to Install Panels

Mounting the panels on the ceiling
See in this article a video about installing MDF panels on the ceiling, it will help you. It is important to note that the ceiling white and other MDF panels are fixed perpendicularly and at an angle of 45 °.
Best for the ceiling is suitable glossy coating. It looks great with built-in light bulbs. And the ceiling will seem higher. A reliable fastening of MDF panels to the ceiling is done using staples (kleimers). Clamper clearances are 2 mm.
It is inserted into the side groove of MDF and fastened using self-tapping screws, a construction stapler or nails.
Panels are cut using electric jig saw. For work, use a respirator (from small chips). With the help of corners decorate the place of joints.
Lighting fitting
The wiring was done before the panels were fixed. Now, in each of the marked places with a drill bit, holes of the required dimensions are made. After that, we mount the fixtures.
Everything, the ceiling is ready. To create a beautiful interior, use only high-quality materials.
Video for ceiling installation from MDF panels
Look at how professionals perform the installation of a panel ceiling from MDF.
MDF panels are today a very popular building material that can be used for various types of interior decoration.
Increasingly, panels have been used for ceiling lining. In this case, both laminated and veneered panels can be mounted.
To obtain this building material, a wooden canvas is used. The process is based on a special technology, according to which the web is subjected to compacting with the addition of additives.

This gives the resulting product fire resistance. The result of this production process is a plate of medium density, which is processed from above by a decorative layer.
How to look like PVC panels with a pattern that are used for the kitchen can be seen in the article.
Kinds
Finishing plates MDF for the ceiling can be of the following types:
- paper coating;
- laminated;
- veneered;
- painted.
The article describes how to use it during the repair.
Painted products actively involved in the decoration of children's rooms, bathroom and kitchen. Thanks to a wide range of colors, everyone can choose the right one for themselves. 
Panels with paper coating Use when decorating ceiling structures in the kitchen, corridor and other rooms. If it is necessary to finish the premises with high humidity, then it is necessary to use laminated panels for the ceiling.
During manufacturing, many manufacturers do not involve harmful resins and phenolic compounds in the process. The surface of MDF panels can be painted with persistent paints, due to which the material acquires an attractive appearance and additional strength. The resulting finish from MDF can easily wash and at the same time preserve its original appearance for a long time.
What cost of finishing panels from outside the house can be learned in this
Thanks to the applied hot pressing method, the resulting ceiling panels acquire high performance characteristics. To date, such products except for the roofing, are used for wall finishing. But in this respect such material has not yet gained wide popularity, because its appearance forms the effect of a "standard box", from which everyone wants to get rid of. But you can solve this problem if you only cover one plane. In this case, the work done will have tremendous results.
In the video - MDF panels for the ceiling:
How does the glass panel for the kitchen look in this
Advantages and disadvantages
When you have started to choose the building material for the ceiling, you immediately begin to look for its positive and negative points. The information obtained allows us to make the right choice. Let's start with the advantages:
- Ease of assembly. This advantage is considered the most important, because in this case, even an inexperienced person can perform the installation of the product. The entire assembly process can take only a few hours. In addition, there is no need to pre-prepare the ceiling plate.
- When working with the material there is no dirt and dust. The assembly of the overhead cover is very quick. If there is damage on one sector, then it can be quickly changed to a new element, while not completely breaking the ceiling.
- With correctly installed MDF boards, it is possible to increase sound and heat insulation.
- Such a finish does not require special care. It is necessary to simply wipe their surface with a damp cloth. Such material is durable, reliable and has a very beautiful appearance.
- The surface of the product can be made in different invoices: a tree, brick or marble.
- Wide range of prices, which is very pleased buyers. Everyone will be able to find the necessary option for themselves.
On the video - MDF wall panels on the ceiling:
How to mount
When you decided to install MDF boards on the ceiling, it is worthwhile to perform a number of simple actions that the coating obtained was not only firmly and securely fixed, but also had an excellent appearance.
Preparatory activities
At the beginning of the work, it is necessary to make the layout of the ceiling structure. To do this, you need to use roulettes, with which you measure the height of the corners, determine the most scarlet and from it lead down to 4-5 cm. The resulting mark will be the starting point. After that, you need to apply the level and draw horizontal lines along the entire perimeter. Already on the received lines the fastening of a directing metal profile is carried out.
On the video - the ceiling of MDF panels with their own hands:
Very often today people try to use wooden beams for the sake of economy. But this is not entirely correct, because often there will be an undried material, which will lead to the fact that eventually the whole structure will lead, ugly crevices are formed. In this case, the repair work will have to be done from scratch.
Suspension brackets
The fixing of suspensions is carried out in steps of 60-70 cm, in pre-made holes for the dowel. Suspended ceiling profiles are installed. Fastening of plastic or gypsum board is carried out to profiles using self-tapping screws, in this case it is necessary to additionally apply the glue. Thanks to them it is possible to get a reliable fastening of the presented material to the ceiling. Before laying the panels, it is worthwhile to lay the electrical wires, placing them in protective corrugations. 
Fasteners
The first plate is mounted to the angular profile using self-tapping screws. With the help of a sticker, the product is attached to the back of all profiles. Thus, the whole thread is assembled. Holes for spotlights should be done in advance, using a puncher and special nozzles.
When symmetrically assembling the MDF panels with respect to the centerline, all side slits should be even. If the gap is about 10 mm, then it must be left. The resulting gap was called the temperature suture. It can be disguised with a decorative strip or other profile strip. After the work done, you get a smooth and beautiful ceiling, which every day will delight you with its attractive appearance.
The assembly of MDF panels is carried out on the principle of a spike-groove. For this reason, their location can be not only in the horizontal direction, but also under any slope, so that you can build semi-circular surfaces.
When using moisture-resistant MDF panels, nails can not be used. Their fastening is carried out by gluing. Between the plates there should be a small gap, which is then filled with a silicone sealant.
On the video - installation of MDF panels on the ceiling:
Manufacturers and prices
In the construction market today, this material is present in a huge range. Based on customer feedback, the following popular manufacturers can be distinguished:

Plates MDF previously actively used only in the process of making furniture. Today, such material has been used to decorate walls and ceiling. Looks like the ceiling design is win-win. Everyone can buy the material, the assortment is very rich. In addition, there are various invoices, so that you can create an imitation of lining, tile and rock.
.
Wide ceiling skirting: description and types »href =» http://potolokspec.ru/dopolnitelnye/plintus-bordyur/shirokij-potolochnyj-plintus-727 "\u003e
).The technology of production completely excludes the use of harmful phenolic compounds and resins. Staining is done with chemically resistant paints. Which give the panels not only high decorative qualities, but also impart additional strength.
Ceilings from MDF panels are easy to clean and preserve for a long time, a pristine appearance.
The technology of mounting MDF panels Before the beginning of finishing works, it is necessary: to prepare the working tool, to get the necessary number of panels and additional elements (see). Panels for MDF ceiling We will need a tool that is sure to be found in the home master ).
).Required Tools
- Pencil.
- Building level.
- Roulette.
- Punch.
- Shears for metal.
- Screwdriver.
Of the materials, we will need:
- MDF panels.
- Ceiling baseboards.
- The profile is metal zinc-plated.
- Suspension.
- Connectors.
Kleimer is a special fastening element, which allows to secure the forcing, MDF panels on the walls and ceilings of the room.
It is a rectangular metal plate that has special cuts and a tongue, which, in fact, the panels are fastened (screws are screwed into the incisions of the plate or nails are hammered). Given that the panels can be used in rooms with high humidity, the brand is specially made in such a way that its anti-rust properties are maximum - it is made of carbon steel and additionally galvanized.
- In the final turn, a decorative skirting board is installed. It will give our design a complete look. And also help to hide the starter fasteners.
Assembly of panels, it is necessary to make holes for spot lights in advance using the "crown".
You can do this on an already installed panel, or before installing it. In the received holes we establish sources of dot illumination. In the case of installing halogen bulbs, remember that they are very sensitive, do not touch them with your hands. All subsequent panels are installed in the same way.
- In the final turn, a decorative skirting board is installed. It will give our design a complete look. And also help to hide the starter fasteners.