Antipyretics for children are prescribed by a pediatrician. But there are situations of emergency care for fever, when the child needs to give the medicine immediately. Then the parents take responsibility and apply antipyretic drugs. What is allowed to give to infants? How can you bring down the temperature in older children? Which medications are the safest?
The options for finishing the ceiling are a huge amount, but the most accessible and simple is whitewashing. With a limited budget for repairs, this solution will be the most optimal, and a clean and smooth surface in any case will give the room a neat, well-groomed appearance. In addition, whitewashing the ceiling with your own hands will not take much time and will not require much effort.
Whitewash the ceiling on the old coating can not: when wet, the previous layers of whitewash will begin to peel and stick to the brush, making it difficult. In addition, the surface will not be perfectly smooth, which is completely undesirable. When cleaning the ceiling, you need to take everything out of the room or cover it with polyethylene, otherwise you'll have to wash everything off lime and plaster.
Step 1. Cleaning the surface
For cleaning you will need:
- bucket with water;
- sponge;
- a metal spatula of medium size;
- clean rags;
- ladder.
If you clean the dry ceiling, a lot of dust will rise, and the process itself will be prolonged for a long time; much faster and more convenient to remove whitewash after moistening. Do not immediately wet the entire area, as the surface dries very quickly, it is better to divide the ceiling into small areas and moisten as you go along.
Wetting whitewash, you need to wait a few minutes, while the layers are soaked with water to the base, then the coating is very easily removed with a spatula. Finally, chalk or lime residues are wiped clean with a damp cloth until there are no traces left.
Step 2. Sealing joints and slots
For further preparation, you will additionally need:
- a serpent;
- putty;
- sandpaper;
- primer;
- brush or roller;
- level.
Between the ceiling slabs there are always joints, which gradually diverge from time to time. So that they do not show through on the ceiling, they are expanded, filled with putty mix, and covered with a serpent on top. On top of the serpentines again apply the putty and carefully rub it with a spatula, a flat surface.
While the joints dry up, the ceiling is carefully inspected and eliminated defects. Small cracks just rubbed with mortar, grooves and chipped shpaklyuyut.
Step 3. Removing stains
Very often on the ceiling there are spots that appear through the finish. It can be difficult to remove them, but it is necessary to do it at the preparation stage, otherwise they will again be visible through the whitewash in a while. Stains from the flow of water are removed with the help of bleach or whiteness: dip a sponge into the liquid and press it against the spot until it brightens. Of course, you need to work in rubber gloves to protect the skin.
To remove stains from rust, copper sulphate is needed. Prepare a saturated solution of bright blue color, well spread the stain, allow it to dry and again repeat everything. If necessary, re-work until the traces are faded. After that, the problem areas are well ground and dried.
Step 4. Alignment
When all the visible defects are removed, the level is applied to the ceiling surface in different places to determine the height difference. If there are depressed areas, they shpaklyuyut separately, and when the solution dries, putty cover the entire ceiling. Usually, the finishing putty is applied, which is applied in 2 layers 1-2 mm thick.
For work, take two spatulas - narrow and wide, when applying hold the spatula at a slight angle to the ceiling. Formed sags or strips are removed after the mixture dries with sandpaper. It is necessary to coat the entire treated area in order to give the surface maximum smoothness. At the end, the ceiling is wiped dry with a dry cloth and ground.
How to whitewash the ceiling
For whitewashing, chalk, slaked lime and water-based paint are used. Each option has its own merits, therefore, in order to determine, you need to know about the basic properties of these materials.
Cretaceous solution is easily applied, has a good covering power, almost no odor. Chalk is a very cheap material, and therefore whitewashing will cost a penny. But at the same time the chalk is very dirty, the preparation of the mortar takes time, and the surface can acquire a yellowish tinge. To prevent this, blue ink is added to the solution.
Lime differs bactericidal properties, well covers fine cracks, long keeps, has a low cost. The disadvantages include a sharp unpleasant odor, which appears when the solution is diluted and the acidity of the material. To lime it is necessary to glue in gloves, otherwise it will corrode the skin on the hands.
Water-based paint is the best option. Its cost is higher than that of chalk or lime, but the covering capacity is much greater. It does not smell, it is easy to apply, it is already sold ready for application, the painted surface does not get dirty. There is a washable paint, which is especially suitable for wet rooms.
The process of whitewashing the ceiling
For whitewash you will need:
- ladder;
- small brush;
- a roller with a length of 20 cm;
- plastic container.
Step 1. Preparation of the solution
To dilute chalk, it will take water, better warm, glue PVA and blue. In water, first glue the glue, and then add small chalk in small portions. The solution is well stirred, smashed all lumps, poured in blue. Again, everything is mixed until uniform. 10 square meters will require 3 kg of sifted chalk, 30 g of glue and 20 g of blue.
Lime for this same area of the ceiling will be less: in the water, you need to dilute 1.7 kg of lime and add 40 grams of blue. The water is first taken a little, about 5-6 liters, and then gradually added, depending on the required concentration of the solution. If necessary, the paint is also diluted, adding only pure water. If you want to give the ceiling a color shade, you can use special pigments.
Step 2. Applying the first layer
Begin to whitewash in the corner from the window; first brush carefully processed joints of the ceiling and walls, and then roller applied whitewash on the surface itself. Do not strongly immerse the roller in the paint, to avoid splashing and streaks, the layer should be thin and even. Whitening follows parallel movements perpendicular to the direction of light. After finishing the application of the first layer, the surface is left to dry completely.
Step 3. Repeated application of whitewash
Through the first layer, the base can be inspected, strips from a brush or roller are also clearly visible. Remove these defects will help the second layer of whitewash, which is applied perpendicular to the first. The solution is necessarily mixed, because lime, chalk and paint could settle to the bottom. After that they begin to whiten from the same place as the first time. Movements should be as uniform as possible, sure, and the quality of the whitewash will be high. In order not to leave unpainted areas, when applying the composition, the ceiling is visually divided into strips and overlaps are made at the joints with a width of 4-5 cm.
After the completion of the work, it is necessary to exclude the appearance of drafts and ceiling lighting by sunlight, otherwise the coating may crumble. Also you can not dust in the room until the whitewash dries; All stains from the paint on the floor and walls should be wiped off immediately with a damp cloth, and then sweep only later so that the dust does not settle on the ceiling. If these simple rules are observed, it will not be necessary to finish the decoration again in 3-4 years.
Video - Ceiling whitewashing
Plow lime - this is the same material, the application of which and consider in the article, that is, tell how to properly extinguish and apply. For the original semifinished product, compulsory blanking is mandatory. It is necessary that during the contact with moisture, the finished structure does not fall apart. Let's try to understand the manufacturing process and the features of this material.
Pusher lime (slaked lime)
Lime-pushenka is an extremely fine white powder, the receipt of which is associated with the extinction of lime.
In its original form, lime is messy lumps, lime is quenched most often in the factory by mixing with a small amount of water.
When you get slaked lime (pushers), its volumes increase significantly (about 100% increase). The resulting material has a bulk density of about 400 kg / m³, and a moisture content of not more than 5%.
The product of blanking can be executed during construction, and can be centralized. During centralized quenching, they combine with the unpolluted wet-grinding particles, with this process improving the quality and increasing the yield.

During construction, lime is quenched by means of special installations, which are called known hydrators. These devices load lumpy lime by about one third (the value of the average thickness of the lime layer should be about 10 cm), since when lime is quenched, the volumes of matter will increase by about half.
In addition, quick lime (puschku) is poured with relatively large volumes of water, since quenching takes place during a short period of time. This is done to avoid overheating the source material, and boiling water. However, if the mixture is quenched gradually, water is added in small doses and a simultaneous observation is made that lime is not cooled.

The amount of lime in one kilogram is converted into lime dough, with a volume of 2 liters. However, this is an average indicator, and much depends on the quality of lime. The result of quenching lime is called "exit test". Consequently, lime-pusher is the only astringent that passes into a powdered state, not through a grinding process, but when water is quenched.
Lime whitewash (how to cook)
Even recently, for residential premises, chalk or limestone whitewash was used. Today, these materials are displaced from the premises by water-based paint, however, if you do not want to overpay or you need a whitewash of an industrial facility, lime whitewash is an excellent solution.

Lime whitewash is usually used to whitewash facades or production facilities. Finishing the surface with it is a cheap and simple method.
Calcareous whitewash does not wash away the rain. This material is excellent for rooms with high humidity, however, it is better to keep from using it in cellars for storing vegetables, the humidity in which is maintained at 10% -20%.
Lime whitewash can be applied over concrete, brick, plastered and wooden surfaces.
Before the lime whitewash is done, the surface must be prepared, dust, mud and easily allowed areas removed, if the facade has cracks, they must be cemented with cement mortar or cement putty.
In the room itself, sealing of large cracks is best done with the help of a lime mortar, and small ones with the help of putty.
Lime whitewash also disinfects bactericidal properties, this is the reason for the absence of fungi, bugs, bedbugs and various bacteria. For this reason, it is often applied to tree trunks.
If you purchase not lime slaked, it must be repaid. To do this, lime is poured into a metal or enameled container, filled with cold water and mixed. In the process of quenching, the lime solution is bubbling and splashing, for this reason, goggles, a respirator and rubber gloves should be worn during this work.
Composition of the lime mortar
Calcareous whitewash is prepared in a ratio of one to three with water. To make whitewash stronger, add table salt in a ratio of 1 g per 10 liters, drying oil (3 tbsp). To give whitewash the right color, use ultramarine, iron wax or ocher. Finished lime whitewash is filtered using a sieve, gauze or kapron stocking.
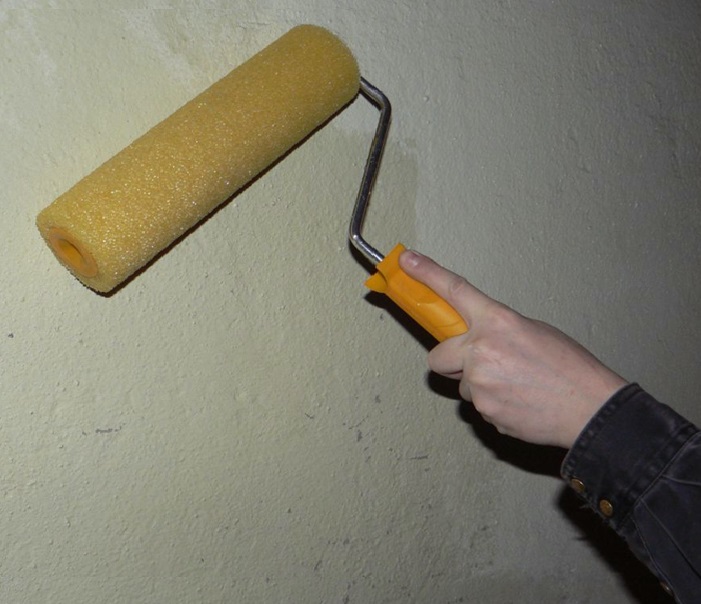
Lime whitewash is applied with a brush with a mackerel, a fur roller or with the help of a spray gun. If a spray gun is used, lime whitewash must be filtered repeatedly. The density of whitewash is checked with a wooden stick, if the calcareous whitewash does not stay on the stick, it means whitewashing is rare, and requires the addition of lime. If there is a thick layer of whitewash left on the stick, then it is too thick, and requires the addition of water. An indication of the normal composition of the whitewash is the complete covering of the stick with the slow flowing of the solution.

Before applying lime whitewash the substrate should be water-soaked. Whitewashing is done in two stages, the application of the second layer can be made on top of the still not dried first. If the whitewash is applied with a spray gun, then in the process you should perform a circular motion with a fishing rod.
If a brush or roller is used to apply whitewash, then the first layer is applied by horizontal movements, and the second one by vertical movements. When lime whitewash is applied to the ceiling surface, the first layer is applied perpendicular to the light, and the second layer is parallel to the light.
Remember that you can burn yourself with lime. Use protective goggles, a respirator, rubber gloves.
Well, on this with the wisdom of limestone whitewashing everything.
Ceiling of the ceiling with lime (application of hydrated lime)
Finishing of this type is characterized by a long service life, and is applied to various surfaces. For this reason, when choosing the method of finishing the ceiling, many people stop on the lime coating.

Be careful! Lime whitewash should not be applied to rusty and greasy surfaces.
Consider step by step how the whitewash of the ceiling is carried out with the aid of a lime mortar:
- Preparation of the base for lime finish. The surface of the ceiling should be primed and plastered. Before applying the lime mortar, it is necessary to ensure the cleanliness and strength of the surface.
- Preparation of lime mortar. To prepare a mortar for two and a half square meters of space, you need slaked lime (0.4 kg) and water (0.6 l). To make the solution strong and water resistant, it should be supplemented with linseed oil (0.3 tablespoons) and table salt (5 g). Further, the resulting mixture should be well mixed in a metal container and filtered through a sieve to get rid of lumps and impurities. To give the solution a bluish shade, add ultramarine (20-25 g) to it.
- Application of lime to the ceiling. The surface of the ceiling should be slightly moistened, then apply 2 layers of whitewash. The application of the second layer is carried out on top of the still not dried first one. These actions will make whitewashing more durable.
An important point! The application of lime whitewash to the ceiling in conditions of elevated temperatures is not desirable, therefore, in the heat, it is better not to lime the ceiling with lime.
Now, a few words about the moments affecting the whitewash quality of the ceiling.
Lime whitewash can be made stronger if it is carbonized (saturated with carbon dioxide). To create the necessary conditions for this process in whitewash, moisture must remain for a while. For this reason, a mandatory condition for applying lime whitewash is the humidity of the surface of the ceiling. In addition, in order to ensure the normal crystallization of the whitewash, its composition must include table salt, which enables the accumulation of additional moisture from the environment in the lime film.
Tips and secrets of painters. How to whitewash walls and ceiling quickly and efficiently.
Before whitewashing, the ceiling and walls must be cleaned of rust and other stains, as well as from the old whitewash, and all cracks and unevenness should be embedded on them, and then ground.
Rust stains and streaks before whitewashing, wash with water, and then treat these places with a solution of copper sulfate (50 ... 100 g of vitriol per 1 liter of boiling water).
Fat stains are removed with a hot 2% solution of soda ash (a clean white rag is wetted with a solution and applied to the spot until it disappears completely). The treated surface is then thoroughly washed with water.
Smoked ceilings, and walls, wipe 2 ... 3% solution of hydrochloric acid.
To seal cracks and other similar defects on the ceiling and walls will require putty. To obtain a simple and reliable putty mix gypsum, chalk and diluted carpentry glue, taken in the ratio 1: 2: 2 (by weight). Recall that for the preparation of a liquid component putty in 1 liter of water dissolve 30 ... 50 g of glue.
It is possible to produce a high-quality filler in a different recipe. Here, 2.5 kg of lime paste (slaked lime of thick consistency) is bred in 5 l of water, then 50 to 100 g of common salt dissolved in hot water are added to the lime, after which the amount of water in the mixture is adjusted to 10 l, not forgetting to thoroughly mix this mixture. It remains to filter the future putty through a fine sieve and add to it 1.5 liters of 10% joinery glue with the powdered chalk powder (150 ... 200 g) mixed in it. Shpaklevku such a composition is successfully used for priming surfaces.
Put the putty on the surface, usually by hand using a spatula.
The cleaned and fouled surfaces of the ceiling and walls are covered with a primer, prepared or according to the recipe of the above putty, or, according to another recipe, based on slaked lime. In the latter case, take 3 kg of slaked lime, a dough-like consistency, 200 grams of laundry soap and 50 ... 100 g of Oxol varnish. Slice the soap with a thin shavings, dissolve in 3 liters of hot water, add linseed oil. Separate in 4 and water dilute the lime. Mix both mortar primer ready. Just do not forget to dilute it before use with water to a total volume of 10 ... 11 liters.
As is known, the purpose of applying a primer to the surface is to create on this surface an even, smooth smooth film, through which the paint would not penetrate, which will allow the latter to surface evenly and evenly dry out.
So, the primer is neatly applied to the necessary surfaces with a brush, roller or paint sprayer. And when it dries, you can begin to actually whitewash.
Usually chalk whitewash for the ceiling and walls is prepared as follows: in 5 liters of warmed up to 40 ... 50 Cords dissolve 30 g of carpentry glue and 3 kg of sifted chalk.
Good quality chalk whitewash will provide a composition that includes 2.3 kg of chalk, 90 g of carpentry glue, 17 g of blue (ultramarine), 60 g of laundry soap and 3 ... 4 l of water (this amount of whitewash is sufficient for painting 10 m2 of the surface ). Remember that if the ceiling or walls were whitewashed with lime, chalk whitewash can not be used, as dirty stains and stains appear on the ceiling.
Here is a recipe for lime scaling: in a small amount of water, 2 ... 3 kg of slaked lime are planted, 400 ... 500 g of water-dyed dyes are added, and 50 ... 100 g of table salt or 150 ... 200 g of alumina alum. All components are thoroughly mixed and, gradually adding water, bring the amount of whitewash to 10 liters. The received structure is better for slightly bruising with ultramarine or blue.
Do not force the drying of the whitewash, so as not to spoil the work. Do not make drafts, and if you just penetrate the whitewashed room with direct sunlight, darken the windows.
Despite the huge variety of modern ways of finishing the walls and ceiling, whitewash still remains very relevant today. Lime formulations can be used in any premises, including wet ones, and also with insufficient heating.
Whitewash: aesthetics and disinfection
Mortar
Quality lime whitewash is an excellent material for painting walls and ceilings indoors. At the same time, whitewashing of the ceiling with lime prepared is also the simplest method of qualitative disinfection of surfaces.
Often, calcareous structures are treated with walls in apartment houses - in particular, in the kitchen and in bathrooms. It should be noted that this material is particularly resistant to the influence of temperature factors, as well as to a permanent high humidity.
Before you start whitewashing lime walls and ceilings, it is necessary to thoroughly prepare the base surface. The accumulated dust, insufficiently strong old plaster and other exfoliated materials are removed, the existing cracks are shredded, and then the walls are well treated with a primer.
The base, prepared for whitewashing with lime, must necessarily be clean. Before applying the lime layer, walls and ceilings must be wetted with water.
How to make a mixture for whitewash?
It goes without saying that the quality of whitewash lime walls and ceiling will depend on whether the solution itself is properly prepared. We offer you the following proven recipe for lime whitewash.
For every two and a half meters of the painted area you will need about half a kilogram of lime mixed with water in a volume of at least seven hundred milliliters. Whitewash will become even more high-quality, water-resistant and, most importantly, very strong, if you add a couple of teaspoons of ordinary table salt to it, as well as half a tablespoon of drying oil.
Try to mix the mixture thoroughly to a uniform state, strain it through a fine sieve in order to remove foreign impurities and lumps. Usually, the ultramarine, diluted with water, is added to the prepared mixture, approximately twenty grams of the solution. This is necessary in order for the whitewash to have a light bluish tinge.
Do not forget that the lime whitewash, prepared in this way, should be applied to walls and ceilings in two layers. The second layer is best applied when the former is still wet. In that case, keeping whitewash out of lime will be much better.
There are several common recipes for the preparation of a calcareous mixture for whitewashing. Let's consider some of them.
Recipe 1: lime dough, salt and water

Ceiling whitewashing
You need three kilograms of lime dough, one hundred grams of table salt, ten liters of water. Dilute the slaked lime in half of the total volume of the liquid. Add salt solution to the milk of lime (the salt is diluted in a liter of hot water). Stir the resulting mixture thoroughly.
Separately, soak in the water necessary toning pigments or ultramarine. Gradually introduce the diluted pigment pigment into the lime mixture, until the desired shade is obtained.
Finally, the remaining five liters of water should be added to the solution, carefully and gently mixed, and then filtered through a fine sieve, get rid of impurities and small lumps. By the way, it is possible to replace table salt with another crystallizing component - aluminum alum, they will need about ten liters about two hundred grams.
Recipe 2: calcareous dough consisting of 50% of water
To prepare the mixture it will be necessary to use a calcareous dough, which contains in its composition fifty percent of water. We take lime in the amount of three kilograms. However, we need a hundred grams of salt and special, alkali-resistant pigments - one hundred grams.
Dilute the calcareous dough in two liters of water, add pre-diluted in a liter of hot water table salt. Then we enter the necessary coloring pigments, gradually add a sufficient amount of water (it needs less if you use a calcareous dough), and, of course, filter.
Experts recommend that in order for the solution to turn out to be reliable and durable, it is necessary to wait until the lime is carbonized. To do this, the mixture applied to walls and ceilings must retain moisture for some time, which is absolutely necessary for the crystallization process.
Winches: advantages
The whitewashing of walls and ceilings with lime has a number of undoubted advantages, among which it should be noted:

Wall whitewashing
- Resistance of the coating to moisture, to constant temperature changes (whitewater absorbs water vapor, which subsequently also evaporates easily);
- Lime coating allows disinfecting the surface of walls and ceiling, which is why this material is suitable for repairing basements and other similar premises.
Good appearance lime whitewash can last for three to four years. Of course, in the event that you have prepared a working mixture by all rules.
However, there are special components that can significantly increase the life of the whitewash, its mechanical strength. For example, a component such as aluminum-potassium alum is often added to the mixture for this purpose.
Rules for working with a lime mixture
There are certain rules not only for cooking, but also for applying lime compounds on the surface of walls and ceiling.
First of all, keep in mind that the strength of the lime coating will depend mainly on the quality of the mixture and on the type of lime that was used to make it. It is recommended to use hot slaked lime, which gives the coating a special strength. Also, experts advise bleaching walls and ceilings on a fresh layer of plaster.
It is best to make a whitewash with a wide brush. Sometimes to accelerate the process using paint sprayers (the nozzle of such equipment in diameter should not be more than four millimeters). Do not forget to prime the walls beforehand, and preferably if the primer is on a calcareous basis. Whitewash is applied in two layers, each layer must dry sufficiently.
It is very important to prepare the base surface of walls and ceiling in time, qualitatively and thoroughly. In no case can you whiten the surface, on which there are traces of rust or grease stains - whitewashing to hold on such a surface will not be exactly.
In addition, it is not recommended to whiten the ceiling or walls with a lime solution on hot days, when there is a lot of sun on the street. Prefer to work on either a cloudy day, or closer to the evening. On the surface that you whiten, do not get direct sunlight.
Safety measures at work
Lime compositions require careful and careful treatment, since they have high alkalinity. Be sure to protect your hands - wear strong gloves. It is also better to wear a hat on your head, and protect your eyes with special protective goggles.
In the event that your hands are still in contact with lime, be sure to wash them in large amounts of water and immediately lubricate with cream.
We recommend that you follow not only your own safety, but also protect the furniture surfaces before starting work. So, in particular, pay attention to protecting furniture and coatings from wood: lime is washed away from them with difficulty.
And after the work is completed, flush all the brushes with plenty of water with vinegar - otherwise, the nap of the brushes will be destroyed.